Sunday, 24 March 2013

Maple Bookcases

  I've been busy building some bookcases for my friend Jody. Should have the finish on them this week.

  The cases are constructed from maple veneered plywood, and the moldings and face frames are of solid maple and the shelves are adjustable. The shelf parts will have solid edging on them soon and will receive the same finish as the cases themselves. Should look real nice once they are in there new home.

Here are some pics I took along the way. Click on the pics for a larger view.

After machining the plywood they are assembled into these rough cases.

The cases are linked together.

Mill and shape some solid maple wood and apply it to the face of the cases.

Mill and shape more maple and join them to create some nice crown moldings for the cases.

 Make some nice trimming for the bottom of the cases to finish them off.

And there you have it. 
It really doesn't happen that fast but what would be the fun in that.

  It'll be nice to get this large project out of the shop and get a little space back. Once I have some finish on them I will post some pictures. I am also working on a built in dresser and closets for our bedroom along with a seat under the window in between. I'll put up some pics of that in the future.

Thanks for looking
Ken


Thursday, 21 March 2013

Cherry Burl to Cherry Bowl

  Here is another one of a kind hand carved bowl.
I thinks this is the most fabulous one to date. Paul and I both put our hands to work on this one and what a beauty it is.


  We used the Arbortech power carving wheel on the Makita grinder to rough out the shape. Working with and around the voids and slowly coaxing out the secrets hidden in this lovely burl.

  When the burl could give no more we stopped grinding and moved on to the sanding wheels, then to the hand scrapers and finished up with a little sanding and finally applied a natural finish.

  Oh how it glows. It is one of a kind and it knows it. Enjoy the show.
Click on the pictures to enlarge them.


Artsy shot for Marina and John :-)


   This bowl was from half of a burl that was harvested about twenty years ago by Paul's father. About five years ago he gave it to Paul and I so we could make something with it. We had many ideas for it but none seemed to do it justice until now. The other half was cut into slices to be used in box lids and soon to be used as inlays on some round table tops.

   We are always on the hunt for nice burls and are in the process of securing some more cherry ones Paul found recently. We should have some more for you to see in the not to distant future.

As always, thanks for reading.
Ken


Monday, 4 March 2013

Butcher Block Refurbished


  Let me begin by saying that this block is big, really big. It's all maple and measures two feet by two feet and is about 10" thick.

  This block has been in my shop for about five months now and after stubbing my toe on it for the hundredth time I went directly to the wood shed and wrangled up some maple to make legs for it.

  Making the legs themselves and the notches in the block to receive them was pretty straight forward.

The owner of the block wanted the legs to be affixed to the sides of the block and must have big square bolt heads visible on them.

  I searched for a week trying to find square head bolts that would have enough girth and length to keep these new stilts attached to the block. I needed very large diameter bolts.
  I finally came up with the idea of hiding the regular hex head bolt behind square headed caps that are used for capping steel pipe.


  Being concerned that racking forces would loosen the legs during proper or improper use of the butcher block (most likely the latter knowing my friend all too well) I added some piping stretchers to the legs just for peace of mind and it looks kind of cool.


  For a finish I used Watco Butcher Block finish on the legs and sides of the block. The Watco finish hardens quite well and should stand some abuse. I like to use only mineral oil for a surface treatment on the block's top. When the item is to come in contact with raw meats I believe mineral oil to be the best choice. I know my friend prefers to use a concoction of mineral oil and beeswax so it will be ready to go.


  I've been using a lot of steel pipe lately in my projects. Different lengths, all types and size of fittings. It must be pretty obvious to the hardware stores that I am not a typical pipe fitter. I must look like a nut to them, down on my hands and knees in the fitting aisle, parts strewn all around me feverishly screwing together pipes and fittings, taking them apart trying another order of fittings and pipe, mixing sizes, saying "no thanks" when they ask if I need any help. I wouldn't be surprised if they mistook me for a bomber and called Homeland Security on me.

Oh well, I hope they have a good chuckle watching the mad fitter in aisle four.

Again, thanks for reading.
Ken


Saturday, 23 February 2013

"Never know what's in the Pickle Barrel 'til ya taken the lid offen it".

  A couple of years ago my brother in law left me with a desktop that once belonged to our father in law. As a tribute to his memory Kevin asked me if I could make something of it. The old top was losing the veneer on one side and the edges were broken so we figured the most obvious thing to make from it would be a table but he was open to interpretation.

  Veneer construction in furniture is like making Oreo cookies. The outer layers (veneer) sandwich a center (substrate) usually made up of wood which costs less or contains visual defects. I stripped a small corner of the veneer off one side to see what the substrate was made from and found that it was oak. It seemed okay. I decided to strip the veneer off of one side, refinish the other side and put a quick table together. After a hurried removal of veneer I put the top in the wood shed to await another day.

  It was a while until that day came and the top had cupped like a drying leaf in the fall. Damn! Really, that is the word I used. Another thing is that I didn't really take a good look at the substrate after removing the veneer. I had figured the marks on the wood must be nail marks or whatever. Well I stripped the rest of the veneer off to find out what we were left with.

 Once all was done it became obvious why they used this wood for a substrate. It had been infested at one time with beetles. This sometimes happens between sawing up the tree and drying. Kiln drying the wood killed the infestation. Too bad, those boards had promise to be some really nice furniture.

 I figured the best thing to do now was get a six pack and have a really nice fire. As I was looking for matches and kindling I thought if the lumber makers didn't offer this wood up to the fire gods then maybe I could still make something with it. Too bad because I really was looking forward to the beer.

  My mind was racing, what do you do with oak that is riddled with holes? Drink beer? No, lets say the wood is distressed, get some steel for a little industrial feel and listen to the Sex Pistols while I work.

  People I give you DIP.

  Yes, that is short for Distressed Industrial Punk. Soon to be all the rage in the Soho galleries. Critics will look down there long noses and marvel it. Furniture purist will despise it. Those that are hip will want it. Only a lucky few will own it...... awe, it's been done before.

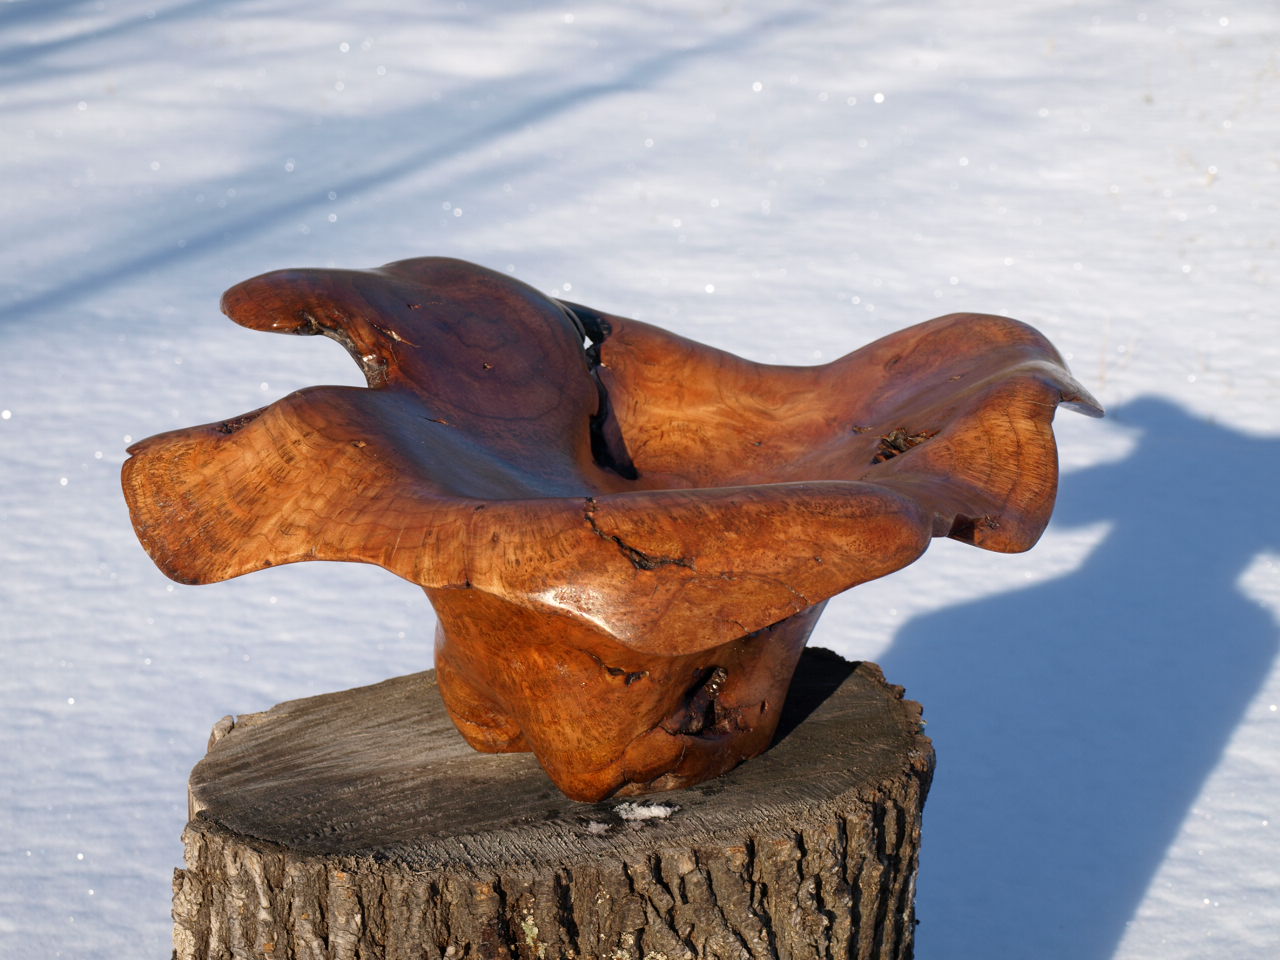
 So the photos show what we have left. I hope they can find a spot to use it or pass it on to the kids and keep a little bit of family history around. Click the photos to enlarge them.


I still really prefer and enjoy making fine furniture but a little tour through the wrong side of town can be interesting. Hopefully the breadboard ends on the top will lend it a little refinement.

As always, thanks for reading.
Ken